
Ingredients (for burger patty)
- ½ cup Chickpeas (Chole) soaked and cooked
- ½ cup kidney beans (Rajma) soaked and cooked
- 250 gms paneer
- 1 medium size potato (boiled)
- 3 tsp fresh ginger garlic paste
- 2 green chillies very finely chopped (use more if needed)
- juice of 1 lemon
- 2 tsp chaat masala
- **Salt as per taste
- 2 tsp fresh coriander (very finely chopped)
- 4 slices of bread
- small bowl of water to dip the bread slices
- 5-6 tsp rava (semolina) before flying
- oil for deep frying
- burger breads
- Mayonnaise & tomato ketchup
- lettuce leaves
- sliced capsicum
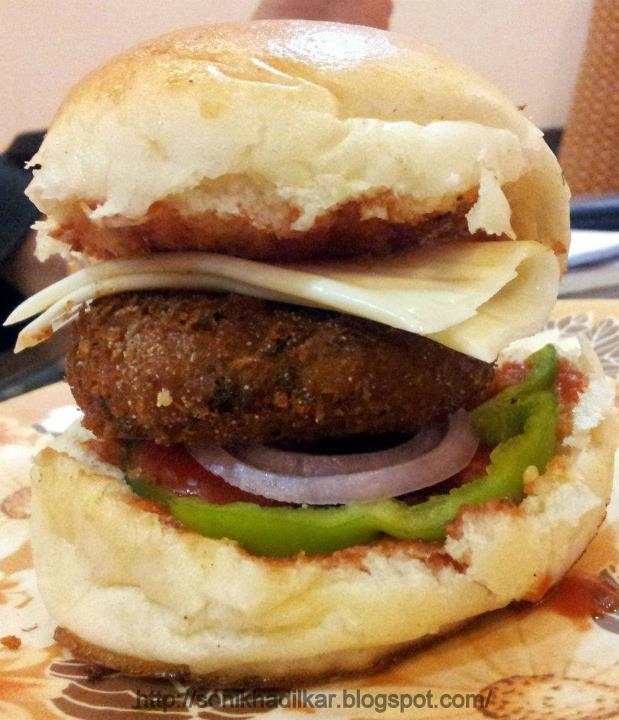
- cheese slices
- onion slices

- In a bowl add together the cooked rajma, chole, grated paneer, grated potato, ginger garlic paste, green chillies, lemon juice chaat masala, coriander. Mix it thoroughly.
- take the bread slices and dip them into the bowlful of water, press the slice between your palms to remove all the excess water.
- Add these slices to the above mixture.
- **note:- taste the mixture before you add the salt, as chaat masala has salt in it. The patty shouldn't become salty, according to the taste add salt.
- and roll them into a burger patty.
- Keep the patty aside before frying.
- Spread the rava on a tray, roll these burger patty on it so that the rava is evenly coated on it.
- In a deep bottom vessel heat oil. Deep fry the patty until golden brown. Keep aside on a kitchen towel to drain excess oil.
- Take the burger bread, spread the mayonnaise & tomato ketchup, arrange onion & capsicum slices. over it arrange the burger patty and the lettuce & cheese slice
- Close the burger and enjoy!!


